ADVERTISEMENT
Most of us spend about 90% of our time inside. This fact shows how important our living spaces are for our happiness. When you decide to paint a room, it’s more than picking a color. It’s a chance to change your surroundings for the better. Painting can be a satisfying project that upgrades your area to look new. By following some interior painting advice and taking careful steps, you can get amazing results. This article will help you from start to finish, from preparing your supplies to applying techniques that last. Are you ready to start?
Key Takeaways
- Prepare adequately for a smoother painting process.
- Choosing the right tools and supplies can make a significant difference.
- Understanding the importance of primer for a polished finish.
- Color choice and lighting play crucial roles in the overall effect.
- Mastering painting techniques can lead to professional-looking results.
- Clean up properly and follow maintenance tips to keep walls looking fresh.
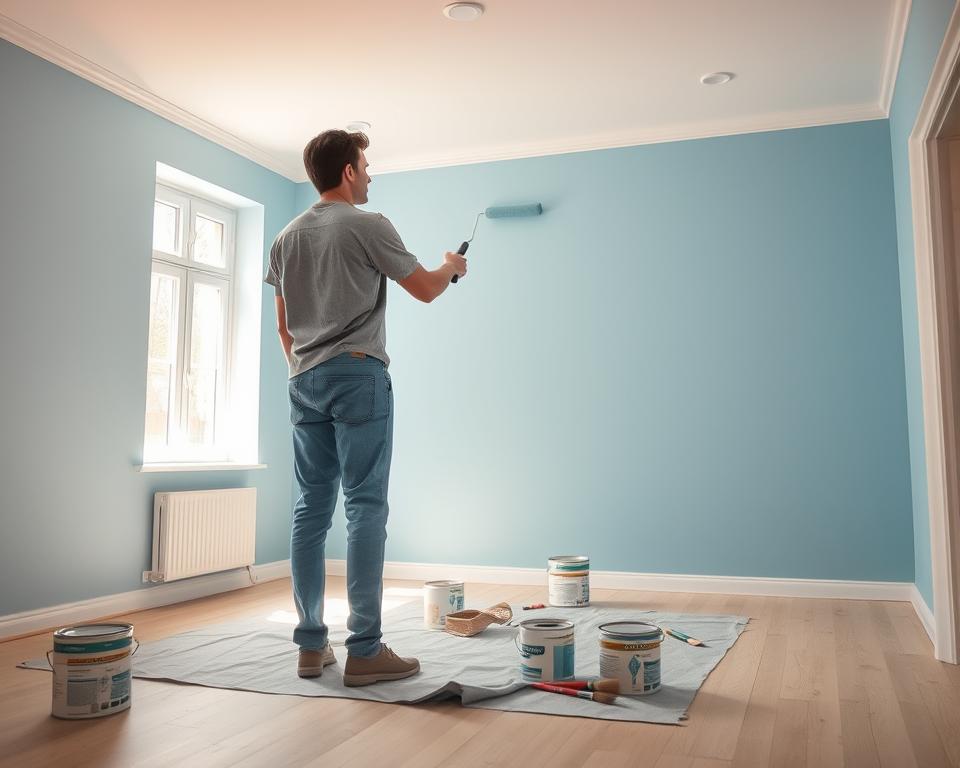
Gather Your Painting Supplies
Organizing your painting supplies is key to a great finish. We’ll go over must-have tools, paint choices, and safety equipment. This helps you start your painting project with everything you need.
Essential Tools for Painting
To get the best results, you need the right tools. High-quality rollers and brushes make paint go on smoothly. A sturdy paint tray also keeps things neat. And don’t forget drop cloths to protect your floors and furniture.
Painter’s tape is another essential for sharp edges. Using dependable tools will make painting much easi
er and more fun.
Choosing the Right Paint
The right paint is important for the finish and how long it lasts. Brands like Benjamin Moore’s Aura® and Regal® are durable and have lots of colors. Think about your room’s light and decor when picking a color.
Paint swatches are a good way to see how colors look in your space.
Safety Gear You Shouldn’t Skip
Painting can expose you to fumes and splashes. It’s important to wear a mask and protective goggles. Gloves are also a good idea for safe material handling.

Prepare Your Space for Painting
Getting a room ready for a paint job is very important. It can mean the difference between a job that looks professional and one that doesn’t. To get ready, make sure surfaces are clean, safe, and ready for paint. Follow important steps to get the best environment for painting.
Clearing the Room
Start by getting everything out of the room that you can. Take out furniture and decorations to make space. If you can’t move everything out, put big items in the middle. Then, cover them with plastic or cloths to keep paint off.
Protecting Furniture and Floors
Sometimes, accidents happen even when you’re careful. Use canvas cloths on the floors to stop paint from splattering. If there’s furniture left in the room, cover it with tough cloths or plastic. This protects them from dust and paint while you work.
Taping Off Edges and Trim
To get clean, sharp lines, use painter’s tape on edges and trim. Take your time with this step before you start painting. It really helps make your work look better. Also, clean surfaces well to remove dirt. This makes the paint stick better and last longer.

Prime the Walls
Putting primer on your walls is a key step many miss but it greatly improves your painting job. There are a few tips for interior painting that make priming easier and more effective.
When to Use Primer
You need to apply primer if you’re going from a dark to a light color, or if the walls are bare or absorbent. When you see stains, a primer that blocks stains is key to stop them from showing through the new paint. A primer gives a smooth surface that makes the top paint look better and more even.
Choosing the Right Primer
The right primer depends on your wall surface. For drywall, a water-based or latex primer is good. For stain-blocking, find products made for that. If your walls have glossy paint before, a bonding primer is the best choice for stickiness.
How to Apply Primer Smoothly
Putting on primer is easy. Start with a roller for most of the wall. Then, use a brush to get around edges and trim. Make sure to apply the primer all over the wall evenly to get a smooth finish later. Let the primer dry completely before you paint the topcoat. This wait is crucial for the paint to stick well and look professional.
| Type of Primer | Best Use | Dry Time |
|---|---|---|
| Water-based Primer | Drywall and light stains | 1-2 hours |
| Oil-based Primer | Wood and heavy stains | 2-4 hours |
| Bonding Primer | Glossy or difficult surfaces | 1-3 hours |
| Stain-blocking Primer | Stained walls | 1-2 hours |
Select Your Paint Color
Choosing the right paint color can make your space look and feel better. With so many options, it’s key to look at popular trends and consider your style. You should also test samples and see how light affects your picks.
Popular Color Trends
Nowadays, paint trends favor calming, natural shades. Think soft blues, warm grays, and earthy greens. These colors make a room feel calm and cozy. Neutrals are also popular for their flexibility and ease in matching with current styles.
Testing Paint Samples
It’s important to test paint samples on your walls before deciding. Paint can look different based on surroundings and lighting. Try a few swatches and watch how they change during the day. This will help you pick the right color for your room’s vibe.
How Lighting Affects Color Choice
Lighting greatly changes how paint colors look. Natural light makes colors brighter and more vibrant. But artificial light can change how colors appear. Choosing the best color means seeing how it looks with different lights. This ensures your room always feels right.
| Color | Effect | Best Lighting |
|---|---|---|
| Soft Blue | Calming and serene | Natural light |
| Warm Gray | Cozy and inviting | Both natural and warm artificial light |
| Earthy Green | Fresh and rejuvenating | Natural light for full effect |
| Neutral Beiges | Versatile and adaptable | Any light type |
Understanding Paint Finishes
Choosing the right paint finish is crucial for a classy look in your home. Different finishes have different jobs, affecting how your space looks and how long it lasts. These tips will help you blend function and style perfectly.
Types of Paint Finishes Explained
Paint finishes can be categorized as follows:
| Finish Type | Description | Best Uses | Washability |
|---|---|---|---|
| Flat | Matte finish that hides imperfections | Ceilings and low-traffic areas | Poor |
| Eggshell | Slight sheen for a soft look | Living rooms and bedrooms | Good |
| Satin | Velvety finish with a subtle shine | Hallways and family rooms | Very Good |
| Semi-Gloss | Durable and slightly reflective | Kitchens and bathrooms | Excellent |
| Gloss | High-shine, highly durable finish | Trim, moldings, and furniture | Excellent |
Choosing the Right Finish for Each Room
Knowing where to use each finish is key for the best look and durability. For example, a flat finish is great for quiet spaces like bedrooms. A semi-gloss is best for wet areas, like bathrooms. Remember these tips for a room that’s not only beautiful but also suits your needs.
Mastering Painting Techniques
Becoming skilled at room painting takes your work from just okay to top-notch. Choosing the right tools and ways to paint makes a big difference in your project’s success. Here, we’ll explore the best strategies and tools for a perfect finish.
The Best Brush and Roller Techniques
It’s key to use top-notch brushes and rollers for great results. A quality brush makes painting edges neat, while a roller covers big areas well. For better roller use:
- Pick a top-grade roller sleeve for a smooth finish.
- Apply paint evenly on the roller to avoid heavy spots.
- Paint in sections, making sure each part blends well with the last.
Using a Paint Sprayer: Pros and Cons
Paint sprayers make the job quicker, especially for big or complex tasks. They offer fast coverage and can reach tricky spots easily. However:
- Setting up and cleaning up takes a lot of time.
- Be aware of overspray. It might need extra cover-up work.
Cutting In vs. Rolling
Using a brush to paint edges before using a roller on the walls makes the edges sharp and clean. Here’s a tip for blending cutting in and rolling:
“Start with cutting in to keep the paint clean along the edges.”
To get the best look, practice is key. Use a smaller brush for detailed edges at first. Then, use a roller for a nice, smooth wall.
Start the Painting Process
To start painting the right way, follow some steps for the best look. First, paint the ceiling, then walls, and lastly, trim and baseboards. Doing it in this order stops drips and makes sure your DIY painting looks great.
How to Paint Ceilings Like a Pro
For a perfect ceiling, grab a roller with an extension pole. It makes reaching high spots easy and spreads paint evenly. Start around the edges with a brush, then fill the middle with the roller. Keep your movements steady and don’t put too much paint on the roller to avoid streaks.
Techniques for Painting Walls
After the ceiling dries, it’s time for the walls. Use a roller and paint in sections. Keep your strokes overlapping to avoid marks. Use a brush for tight spots to ensure full coverage.
Painting Trim and Baseboards
Finally, focus on the trim and baseboards. Choose a small brush or roller for precise painting. Go slow for a smooth look. This step brings out the best in your room, making your effort worth it.
Managing Drying Time
Knowing how long paint dries is key to a good painting job. It’s important for planning when to apply each coat. Paint usually dries to the touch in a couple of hours. But, it might take days to fully cure. The drying time can change based on humidity, the room’s temperature, and airflow.
How Long Does Paint Take to Dry?
Paint typically dries in 1-3 hours. But, deep layers or oil-based paints need 6-8 hours. Always check the paint can for exact times. This helps you plan well for a smooth finish.
Factors That Affect Drying Time
Some conditions can change how fast paint dries. Keep an eye on these:
- Humidity: High humidity means slower drying and a tacky finish.
- Temperature: Heat speeds drying, but cold slows it down.
- Ventilation: Good airflow makes paint dry quicker. Open windows or use fans to help.
Clean Up After Painting
Cleaning up after DIY room painting keeps your tools ready for next time. It also makes sure your space is neat and safe.
Properly Cleaning Your Brushes and Rollers
Start cleaning your brushes and rollers right after you’re done painting. For latex paint, warm, soapy water is best. Swish the brushes and rollers around to get all the paint out. For paint that’s oil-based, you’ll need something like mineral spirits. This step is key to keeping your tools in shape.
Disposing of Paint and Materials Safely
You must throw away leftover paint and materials the right way. Look up what your town says about getting rid of paint. This keeps everyone safe and protects the environment. Many places have special spots for getting rid of stuff like this safely. Always stick to your area’s rules.
Restoring Your Furniture and Space
After painting, put everything back carefully. Clean up any drips of paint you find. Wait until everything’s dry before you put stuff back. This keeps paint off your things. A tidy space looks welcoming.
Touching Up and Finishing Touches
After working on room painting, the final steps can really boost the look. Once dry, you should check the walls for mistakes or spots you missed. A small brush is perfect for touch-ups, keeping your paint smooth and sharp.
Finding Mistakes and Fixing Them
Look closely at edges, corners, and where colors meet. Fixing these spots well can make your walls appear flawless. It’s smart to have extra paint ready for these quick fixes, avoiding the hassle of a complete repaint.
Adding Finishing Touches for Professional Results
Finishing touches can truly upgrade your room’s look. Caulking gaps between the trim and walls creates a neat edge. Also, new hardware or lights can beautify the space, finishing off your project nicely. These details highlight the quality of your painting skills.
Maintenance Tips for Painted Surfaces
Keeping your painted walls beautiful is key to their long life. Taking regular care of them helps keep your space looking great. Here are tips to help you maintain your interior paint.
How to Care for Your Painted Walls
Clean your painted walls often to keep them shining. Use a soft cloth or duster to wipe away dust. For a deeper clean, gently use a damp sponge with mild soap. Avoid strong chemicals to prevent damage to the paint. Set up a cleaning schedule that fits your life. This makes keeping your walls looking good easy.
Signs It’s Time to Repaint
It’s important to watch for signs of wear on your painted surfaces. Look out for peeling, fading colors, or stubborn scuffs. These signs may mean it’s time for a new paint job. Checking your walls regularly helps you know when to repaint. Staying ahead of issues keeps your space welcoming and well-kept.
Conclusion: Enjoy Your Freshly Painted Room
Finishing a paint job is more than a color change; it makes your space new. Look at your walls and think about the journey. Every step, from picking brushes to the final stroke, made your room look pro and feel great.
Final Thoughts on the Painting Process
Enjoy your room’s new vibe, but don’t forget the hard work behind it. Working alone or with friends, each brush stroke has its tale. These skills you’ve learned not only make rooms look good but also prepare you for more.
Celebrate Your Accomplishment!
Add your touch to the room to match the new paint. Share your story and the outcome with others. It might motivate them to start painting. Taking pride in your space boosts your mood and surroundings. Love your room’s new look!