ADVERTISEMENT
Did you know the right spot for wall art can make a room feel 30% prettier? Yes, it’s true! How you place artwork doesn’t only matter for looks; it changes the whole vibe of a space. Learning to hang wall art the right way can makeover your home. It brings balance and harmony. In this article, we’ll show you how to hang your wall decorations like a pro. Whether you’re doing it yourself or want expert tips, we’ve got you covered. You’ll learn how to display your pieces to catch the eye and beautify your place.
Key Takeaways
- Learn the significance of wall art placement in enhancing room balance.
- Discover techniques to create focal points using wall decor.
- Understand the ideal height and alignment for hanging art.
- Explore essential tools necessary for effective art hanging.
- Gain insights into arranging multiple pieces for an impressive display.
Understanding the Importance of Wall Art Placement
The way you place art at home changes the feel of your space. Great art placement can make any room look better by adding harmony and beauty. So, knowing where and how to hang your art is important for a nice atmosphere.
The Impact on Room Aesthetics
Art turns empty walls into expressions of your personality and creativity. Putting art in the right spot can catch the eye and make a room flow better. In places where people hang out, placing art at eye level can spark conversation. And, big art pieces in large rooms can make a bold statement.
Creating a Focal Point
Having one main art piece can really change how a room feels. Focal points pull in attention and create a vibe. Use bright colors or cool designs to make your statement piece pop. Pick a central spot for your art to make your place more interesting and warm.

Smart art placement makes your home more beautiful and your life better. It shows off your style. Every choice in how you display art matters, so choose wisely!
Choosing the Right Wall Art
Choosing wall art is a big deal for your space. Knowing the different styles and types helps you find art that matches your taste. You can pick from vivid abstracts to calm landscapes, depending on what you like.
Different Styles and Types
Wall art includes paintings, prints, and photos. Each type brings its own creative flair. Here are some styles to think about:
- Abstract Art: Gives a modern look with bright colors and shapes.
- Landscape Paintings: Brings a sense of peace and nature.
- Photography: Adds a personal touch with captured moments.
- Prints: Offers various themes at a lower cost, so everyone can enjoy art.
Using a mix of these styles makes your room interesting and complete. Tips on hanging wall art recommend combining different textures and sizes for an interesting look.
Matching Art to Your Space
It’s important for your home décor to match. Think about your room’s colors and style when choosing art. Art that goes well with your room makes everything look balanced. Keep these ideas in mind:
- Consider Colors: Pick art that matches or contrasts with your wall color.
- Think About Size: Use big pieces as focal points and small ones to add detail.
- Reflect Your Style: Choose art that shows off your personality and fits your home’s theme.

Picking your wall art carefully can make your space welcoming and unique. It’s also crucial to hang your art the best way to fully display its beauty.
Ideal Height for Hanging Art
Finding the right height to hang art makes a big difference in a room. The 57-inch rule is often used. It means putting the middle of the artwork about 57 inches off the floor. This is because it’s where most people’s eyes naturally go. Knowing this rule makes hanging frames easier and more effective.
The 57-Inch Rule Explained
The 57-inch rule is a great starting point for hanging art. It creates balance and puts art where people can enjoy it easily. But remember, it’s okay to adjust based on your space or furniture.
Adjusting Height for Different Spaces
In rooms with low ceilings or different furniture, the hanging height might change. With lower ceilings, hang art a bit lower to look right. Also, the furniture can influence how high to hang art. This ensures your art fits well with your room’s look.
Tools You’ll Need for the Job
Before you begin hanging your wall art, it’s smart to gather the right tools first. Having the correct supplies means you can hang pictures easily and make sure they look great and stay put. Here’s what you’ll need.
Essential Tools for Hanging Art
These are the main tools that’ll help you hang your art safely and quickly:
- Measuring Tape: Precise measurements are key. A measuring tape helps find the best spot on your wall.
- Level: This tool keeps your art looking straight, which avoids a crooked look.
- Hammer: It’s a basic tool, but it’s perfect for putting nails in the wall.
- Picture Hanging Hardware: A mix of hooks, wires, and nails makes sure even heavy pieces are hung safely.
Optional Supplies for Perfect Placement
Think about these extra items for an even better art hanging experience:
- Templates: Use cardboard templates for a test run before you drill holes in the wall.
- Picture Lights: Lights can really highlight your art, making it pop.
Making a Template for Wall Art
Planning your art step-by-step can really change how your decorating turns out. Using templates made of paper or cardboard is a smart way to see the layout before using your wall. This method helps perfect the alignment and lets you try out different decor styles easily.
Using Paper or Cardboard Templates
To make your own templates, cut paper or cardboard to match your art sizes. This DIY trick lets you play with layouts. Just stick these templates on the wall with painter’s tape. It shows how each art piece will look in place, helping you decide on spacing and layout without any permanent changes.
Visualizing Your Art Arrangement
With the templates up, take a step back and look at your design from various angles. This helps you see how the art fits with your room’s decor. It allows you to adjust things before the final hanging. This way, you create a display that fits your style perfectly. Using these methods can make hanging art much simpler and improve your room’s look.
How to Arrange Multiple Pieces of Art
Putting together many pieces of art can make your area look like a captivating gallery. When you think about where to place wall art, consider the layout and how each piece looks together. Picking a cohesive theme makes everything look harmonious and improves your room’s look.
Gallery Wall Ideas
A gallery wall is a fun way to display lots of art. You can arrange the art in a grid or a more freeform style. Here are some tips for a great gallery wall:
- Choose a Theme: Pick pieces that match in color or style to look good together.
- Balance Sizes: Use art of different sizes to keep things interesting.
- Plan Your Arrangement: Before hanging, use painter’s tape to plan where everything goes.
Symmetrical vs. Asymmetrical Layouts
Symmetrical and asymmetrical layouts have their unique effects. Symmetrical layouts give a sense of balance and are great for classic settings. Asymmetrical arrangements add energy and are perfect for modern spaces. Here’s a quick look:
| Layout Type | Characteristics | Best Suited For |
|---|---|---|
| Symmetrical | Even distribution of pieces, mirrored placement | Traditional and formal spaces |
| Asymmetrical | Uneven distribution, varied sizes and shapes | Modern and eclectic spaces |
Exploring different wall art placement ideas and techniques can create a stunning look. Space pieces consistently, using the two-thirds rule for a pleasing arrangement.
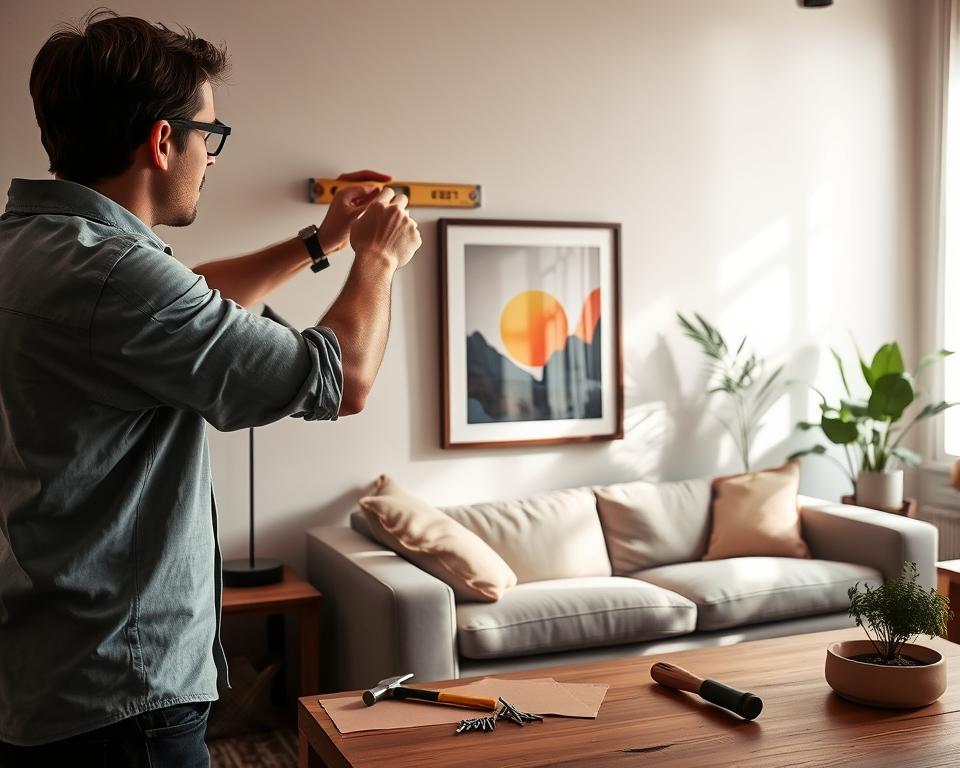
Leveling and Aligning Your Art
When hanging wall art, being precise is key. It’s important to make sure that your artwork is straight and lined up right. Using a level can really make your display look better and more professional. By checking your work, you avoid the problem of art that looks off.
Using a Level for Precision
Using a level helps you hang art accurately. Here’s a simple way to do it:
- Attach the level to the top of your artwork once you’ve placed it on the wall.
- Adjust until the bubble is centered between the lines, indicating that your art is perfectly straight.
- Recheck your measurements if necessary, especially if using multiple pieces.
Tips for Straight Hanging
There are more ways to hang art straight, aside from using a level:
- Measure from the ceiling or the top of furniture to maintain a consistent alignment.
- Use painter’s tape to outline where the top edge of the frame will sit on the wall.
- Enlist a friend to hold the art while you step back and assess the alignment.
How to Hang Heavy Art Safely
Displaying heavy art safely and beautifully is important. You need the right techniques to hang art without damaging it or the wall. Finding wall studs and choosing strong hardware are key steps for a secure display.
Finding Studs in Your Wall
Studs offer a strong support for heavy frames. They are usually 16 or 24 inches apart. A stud finder helps you locate them accurately. Mark their position on the wall to know where to place your art.
Choosing the Right Hardware
For heavy art, you need sturdy hardware. Picture hooks might not hold up. Use wall anchors or toggle bolts instead. They handle weight better, keeping your art safe. Always check the weight limit to avoid accidents.
Creating Balance in Your Art Display
Getting the balance right in your art display can make any room feel good. Knowing how to mix the visual weight and colors correctly is key. Putting up art with thought about heavy and light pieces makes everything stand out the right way.
The right use of empty space makes your setup even better. It lets your eye take a break and focuses on the important parts.
Visual Weight and Color Considerations
Think about the visual weight when you’re arranging your art. Balance heavy items with lighter ones by considering their size and color. Dark colors like navy or burgundy seem heavier than light colors.
Mixing different colors helps everything look unified. This way, no piece will take all the attention, creating a more interesting display.
The Role of Negative Space
Negative space is the empty areas around and between art. It’s important for making your art display look good. This space gives your display room to breathe, making it more dynamic.
For example, a big piece on a blank wall catches the eye but isn’t too busy. Using negative space well frames your art nicely without making things look crowded.
Incorporating Lighting with Wall Art
Lighting is key when it comes to showing off wall art the right way. Using different lighting methods can make the art stand out more. Think about creative ways to place your wall art. Also, different lights can make the artwork look even better.
Spotlighting Your Creations
Spotlights can really change how a room feels. You might want to put lights right above your art for a highlighted look. This method makes the details, colors, and textures pop. You can also try LED track lighting. It lets you shine a light on various artworks as you like. This makes your display flexible and focuses on different pieces.
Using Natural Light Effectively
Natural light is a great way to bring out the beauty in your wall art. Try to place art near windows to use sunlight, which changes, adding a lively feel. However, direct sun can make colors fade. Using sheer curtains can help protect the art by softening the light. Thinking about where to put your art and mixing in lighting will really show it off well.
Regularly Reevaluating Art Placement
Keeping your home lively and inviting means often changing where your art hangs. When you switch up your art, you make your space feel new. This doesn’t cost much but has a big impact. If art stays in one spot too long, it might not stand out anymore. So, moving art around helps keep your decor fresh and interesting.
When to Change Your Art Arrangement
It’s good to think about when to rearrange your art. Maybe when seasons change, like during spring or fall, to mirror the natural world indoors. Or during special times like holidays or anniversaries. Changes like these make your room look new and show off your personal style.
Seasonal Swaps for Freshness
Swapping art with the seasons can really brighten up your place. You could move art between rooms or pick pieces that go with the season. For cooler months, bright art can warm things up. And for autumn, think about using art with warm, earth tones. Changing your art with the seasons lets you enjoy your collection more and keeps your home feeling fresh.
Final Touches for a Polished Look
Getting that polished look for your art isn’t just about how you hang it. It’s also about adding finishing touches that make everything pop. Adding accessories like sconces or decorative brackets can really enhance your art. They add personality and spotlight your pieces, making them stand out.
A well-chosen sconce can create amazing light and shadow effects. This makes your art display even more appealing.
Keeping your art display looking great means regular maintenance too. You need to dust and clean regularly to keep everything shining. And if the lighting or decor around your art changes, think about rearranging your pieces. This keeps the look fresh and reflects your updated style.
When you hang your artwork, make sure it’s straight to keep a polished look. Checking your artwork’s alignment after putting it up is a good idea. This avoids any slanting that could spoil your display. With neat accessories and ongoing care, your wall art can be a beautiful highlight in your home for a long time.